
OCR For Devanagari Handwritten Character: Segmentation, Localization using NumPy
A localization, segmentation and the first version of OCR using NumPy.
This is a part 2 of a blogging series.
- Part 1: OCR for DHC: Building a Classifier
- Part 2: OCR for DHC: Segmentation, Localization and First Version
- Part 3: OCR for DHC: Building a Web APP
Contents
- Introduction
- Dummy Image
- Crop An Image
- Segmentation
- Localize Text
- Classification
- Class: Devanagari Handwritten Character OCR
- Finally
- What next?
Introduction
This is the part where most of my efforts were used. Image Segmentation using NumPy sounds stupid idea but it actually is very interesting to work on. So here on this blog I will try to make a segmentation faster and easier than the previous project also I will try to make this OOP styled.
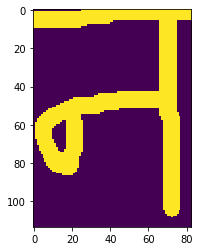
Dummy Image
Go to paint and draw a text just like below or for the best practice download the image below.
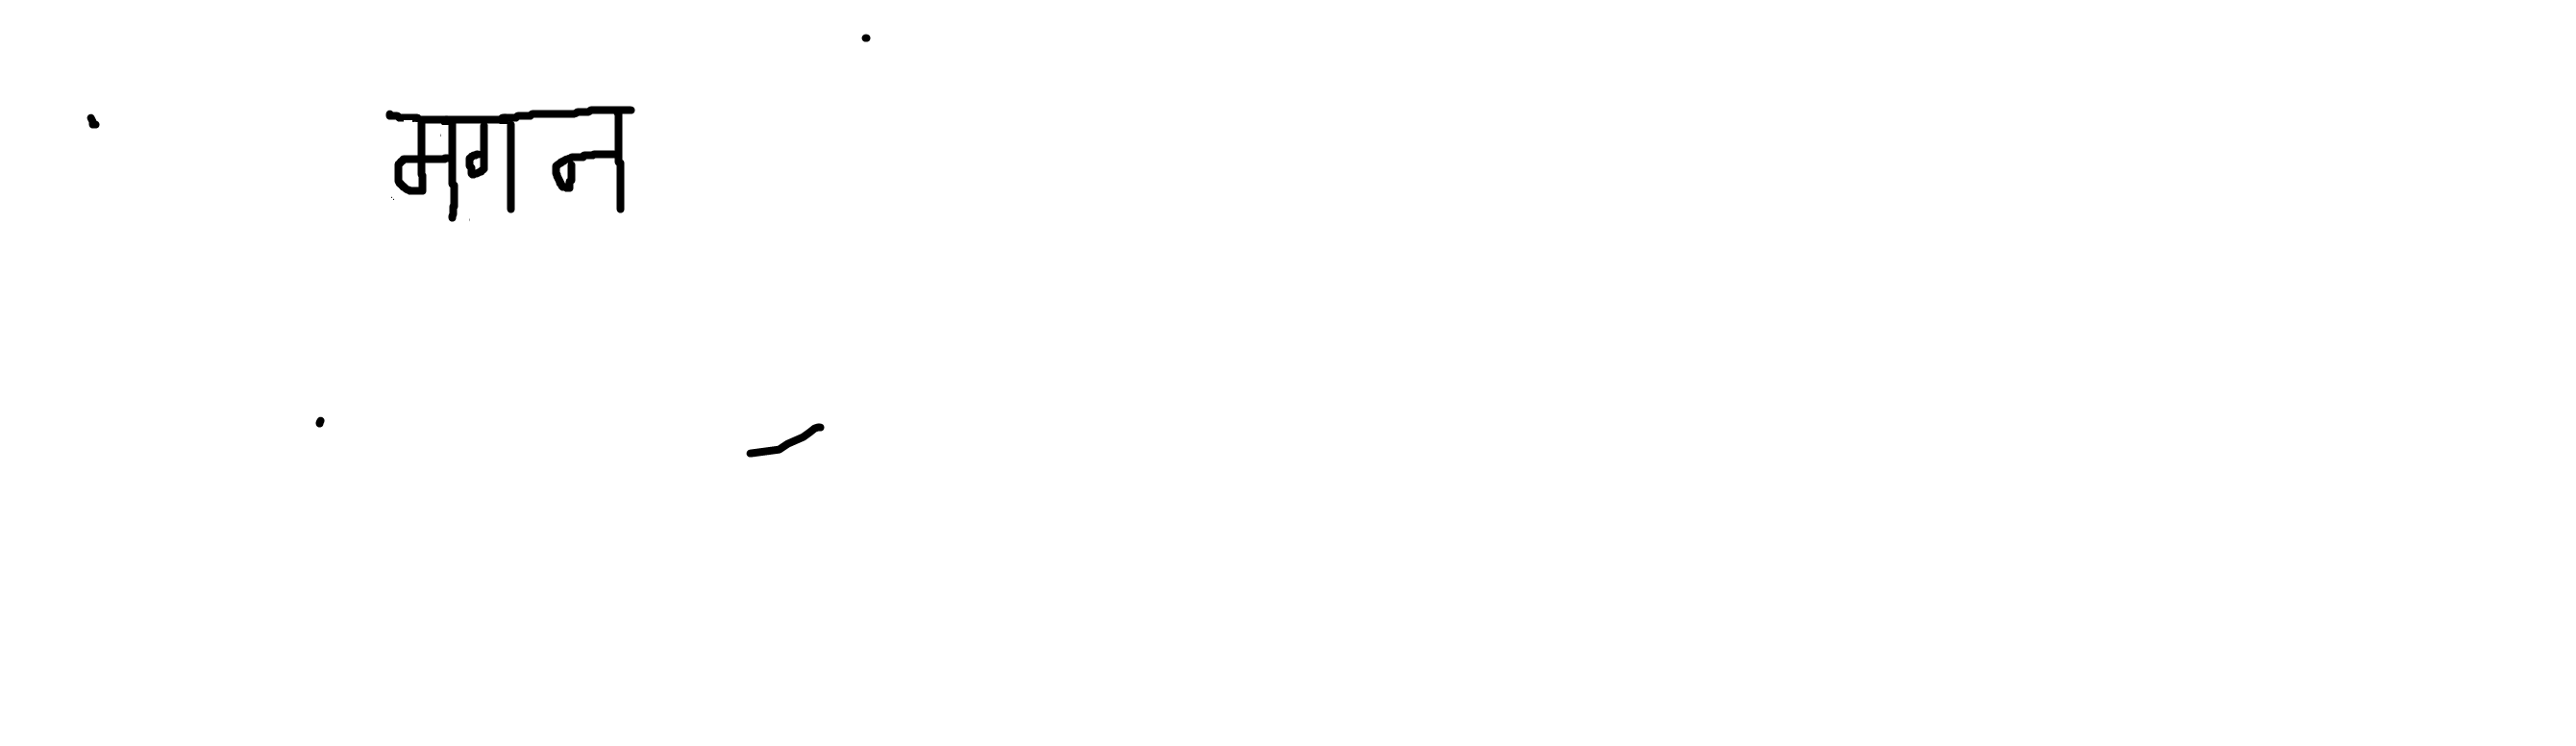 On above image, there are some noises added for the test case. Our target is to make a OCR that can work with some background noises also.
import numpy as np
import matplotlib.pyplot as plt
import cv2
import time
import warnings
warnings.filterwarnings("ignore")

img = cv2.imread("Assets/magana.png", 0)

def show(img, figsize=(20, 20)):
    fig = plt.figure(figsize=figsize)
    plt.imshow(img, cmap="gray")
    plt.show()
show(img)

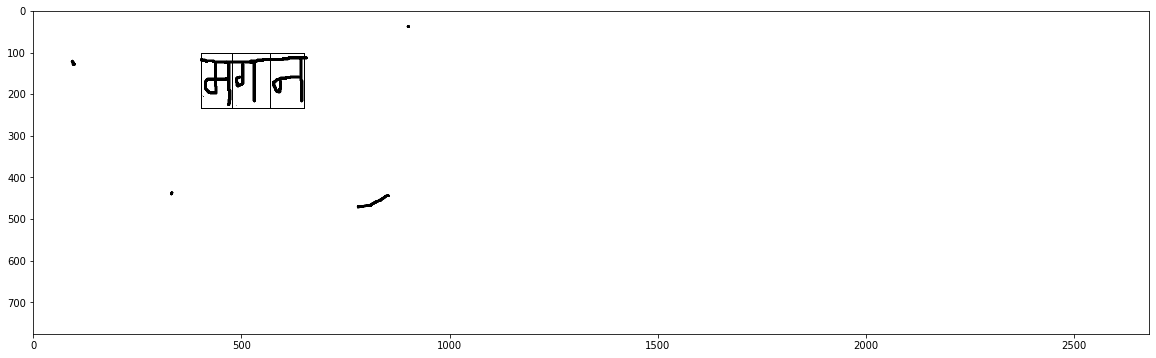
Crop An Image
As seeing on above image, it is clear that the real text lies on some portion of the entire image and most part of the image is background. SO we have to crop a image part where text lies. The idea is simple.
- Define some variables like how many of pixels will be considered as noise. On above case there are dots and a small line too. How can we define a variable that can eliminate both noises?
- Lets say for some case 9.2% of total rows will be noise. What will be noise? Any texture that has rows less than or equal to 9.2% of total rows is a noise.
- Make an array which have single row and column equal to image’s. Let its values be background color.
- for each row of image (from top):
- If current row is equal to array with background color then increase our count.
- Else make count 0.
- If count is greater or equal to check value then the texture we found
checkstep ago is not noise so break from the loop because we found a top part of text.
- for each row of image (from bottom to top):
- If current row is equal to array with background color then increase our count.
- Else make count 0.
- If count is greater or equal to check value then the texture we found
checkstep ago is not noise so break from the loop because we found a bottom part of text.
- Follow step 4 and 5 to find the left and right part of the text.
See the demo
The code below shows the result.
def borders(here_img, thresh, bthresh=0.092):
shape = here_img.shape
#check = int(115 * size[0] / 600)
#check = int(55 * size[0] / 600)
check= int(bthresh*shape[0])
image = here_img[:]
top, bottom = 0, shape[0] - 1
#plt.imshow(image)
#plt.show()
#find the background color for empty column
bg = np.repeat(thresh, shape[1])
count = 0
for row in range(1, shape[0]):
if (np.equal(bg, image[row]).any()) == True:
#print(count)
count += 1
else:
count = 0
if count >= check:
top = row - check
break
bg = np.repeat(thresh, shape[1])
count = 0
rows = np.arange(1, shape[0])
#print(rows)
for row in rows[::-1]:
if (np.equal(bg, image[row]).any()) == True:
count += 1
else:
count = 0
if count >= check:
bottom = row + count
break
d1 = (top - 2) >= 0
d2 = (bottom + 2) < shape[0]
d = d1 and d2
if(d):
b = 2
else:
b = 0
return (top, bottom, b)
def preprocess(bgr_img):#gray image
blur = cv2.GaussianBlur(bgr_img,(5,5),0)
ret,th_img = cv2.threshold(blur,0,255,cv2.THRESH_BINARY_INV+cv2.THRESH_OTSU) #converts black to white and inverse
rows, cols = th_img.shape
bg_test = np.array([th_img[i][i] for i in range(5)])
if bg_test.all() == 0:
text_color = 255
else:
text_color = 0
tb = borders(th_img, text_color)
lr = borders(th_img.T, text_color)
dummy = int(np.average((tb[2], lr[2]))) + 2
template = th_img[tb[0]+dummy:tb[1]-dummy, lr[0]+dummy:lr[1]-dummy]
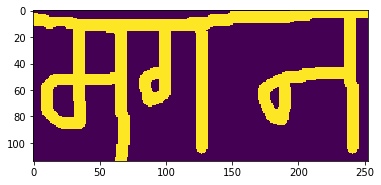
plt.imshow(template)
plt.show()
return (template, tb, lr)
prepimg, tb, lr = preprocess(img)
Notes
- The thresholding of an image is most important part because we have to get pure black and white image so that tasks like segmentation becomes easier.
- The value
bthreshon above function is defined by experimenting with different examples. Our goal is to find the best vlaue which can eliminate as many noise as possible. - The problem here is that if two consecutive noises on different places appears then this algorithm fails.
- The background color of image is taken by checking 5 pixels from top left of the image. This approach works for the most of the time but is not a best one.
- The variable
dummyis taken so that we can take little bit of space around the text.
Segmentation
The segmentation of an image can be done by the same idea given above but problem rises when we are working with characters like ग.
- Define some variables like threshold bg color, minimum length of segment, how many % of the portion should be eliminated as top part, how many % of space is allowed between two characters etc.
- Tilt an image, ie. translate.
- Make an list
bg_keyswhere we store all the row, for which the value is equal to background color. - Scan from top to bottom.
- If current row is equal to background color then append this row i.e row number not the value.
- Make a new list
new_keys, where we add the first row and last row from the listbg_keys. - Scan for each value on list
new_keys.- If the difference between current value and next value is greater or equal than the value that we defined as space. i.e on 1st step.
- If it is then append current value to
new_list.
- If it is then append current value to
- If the difference between current value and next value is greater or equal than the value that we defined as space. i.e on 1st step.
- Sort the values inside list
new_list. - Scan for false segments i.e segement whose length is small then defined value and eliminate these segments.
- Finally, take these final segmenting column values and crop the part of image from the image that was given here. i.e. cropped image.
- Return these image segments.
See the Demo
def segmentation(bordered, thresh=255, min_seg=10, scheck=0.15):
try:
shape = bordered.shape
check = int(scheck * shape[0])
image = bordered[:]
image = image[check:].T
shape = image.shape
#plt.imshow(image)
#plt.show()
#find the background color for empty column
bg = np.repeat(255 - thresh, shape[1])
bg_keys = []
for row in range(1, shape[0]):
if (np.equal(bg, image[row]).all()):
bg_keys.append(row)
lenkeys = len(bg_keys)-1
new_keys = [bg_keys[1], bg_keys[-1]]
#print(lenkeys)
for i in range(1, lenkeys):
if (bg_keys[i+1] - bg_keys[i]) > check:
new_keys.append(bg_keys[i])
#print(i)
new_keys = sorted(new_keys)
#print(new_keys)
segmented_templates = []
first = 0
bounding_boxes = []
for key in new_keys[1:]:
segment = bordered.T[first:key]
if segment.shape[0]>=min_seg and segment.shape[1]>=min_seg:
segmented_templates.append(segment.T)
bounding_boxes.append((first, key))
first = key
last_segment = bordered.T[new_keys[-1]:]
if last_segment.shape[0]>=min_seg and last_segment.shape[1]>=min_seg:
segmented_templates.append(last_segment.T)
bounding_boxes.append((new_keys[-1], new_keys[-1]+last_segment.shape[0]))
return(segmented_templates, bounding_boxes)
except:
return [bordered, (0, bordered.shape[1])]
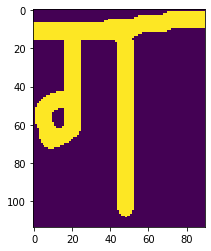
segments=segmentation(prepimg)
for simg in segments[0]:
plt.imshow(simg)
plt.show()
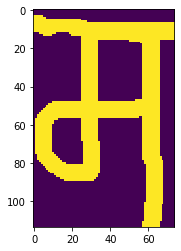
So far so good. I encourage you to try other images also and if you can not find the best segments, then always try to tune the values before editing the code.
Localize Text
Now we have found a segments of our image and we also have cropped our image to find only text part but now we have to draw a rectangle or bounding box around them. How can we do that? The problem we currently have is, we have segmented a cropped image and we must show the segments on real image, how can we do that? I tried to do the template matching on original image. Which is time consuming plus sometimes false rectangle is drawn but what we can do is draw a rectangle around a segments by using the segmenting columns and top/bottom, left/right values.
Below is a working pseudo-code to do localization.
- Take a original image, top/bottom, left/right and segments values.
- Make a copy of original image and make an empty list
boxesto store all boxes. - Loop through every segmenting values:
- Append (top, bottom, left, right) to
boxes.
- Append (top, bottom, left, right) to
- Draw rectangles and return drawn image and
boxes.
def localize(orig_img, tb, lr, segments):
    d=5
    rimg = orig_img.copy()
    boxes = []
    for simg, bb in zip(segments[0], segments[1]):
        bb = np.array(bb)
        bb += lr[0]
        # draw rows
        rimg[tb[0]-d:tb[0], bb[0]-d:bb[1]+d] = 0
        rimg[tb[1]:tb[1]+d, bb[0]-d:bb[1]+d] = 0

        # draw cols
        rimg[tb[0]-d:tb[1]+d, bb[0]-d:bb[0]+d] = 0
        rimg[tb[0]-d:tb[1]+d, bb[1]-d:bb[1]+d] = 0

        boxes.append((tb[0]-d, tb[1]+d, bb[0], bb[1]))
        #show(rimg)
    rimg = img.copy()
    print(boxes)
    for box in boxes:
        t, b, l, r = box
        cv2.rectangle(rimg, (l, t), (r, b), (0, 0, 0), 2)
    show(rimg)
    return rimg, boxes
localized = localize(img, tb, lr, segments)
[(104, 236, 405, 479), (104, 236, 479, 569), (104, 236, 569, 652)]
Now we have found a segments on entire image. We have also found a better way of localizing image. Now is the time to pass each segments to classifier.
Classification
Resize an image segment and then pass it to the classifier. As doing this step, you might find the classification false but don’t panic because the best option will be to train your model for bit more.
- Read the json file.
- Load a model and load weights.
- Make labels.
- Return accuracy and label.
import numpy as np
from tensorflow.keras.models import model_from_json
from tensorflow.keras.models import load_model

def prediction(img):
    # load json and create model
    json_file = open('cnn\cnn.json', 'r')

    loaded_model_json = json_file.read()
    json_file.close()
    loaded_model = model_from_json(loaded_model_json)

    # load weights into new model
    loaded_model.load_weights("cnn\cnn.h5")
    #print("Loaded model from disk")

    loaded_model.save('cnn.hdf5')
    loaded_model=load_model('cnn.hdf5')

    characters = '०,१,२,३,४,५,६,७,८,९,क,ख,ग,घ,ङ,च,छ,ज,झ,ञ,ट,ठ,ड,ढ,ण,त,थ,द,ध,न,प,फ,ब,भ,म,य,र,ल,व,श,ष,स,ह,क्ष,त्र,ज्ञ'
    characters = characters.split(',')

    x = np.asarray(img, dtype = np.float32).reshape(1, 32, 32, 1) / 255

    output = loaded_model.predict(x)
    output = output.reshape(46)
    predicted = np.argmax(output)
    devanagari_label = characters[predicted]
    success = output[predicted] * 100

    return devanagari_label, success
- Now take each segemts, resize it to model input shape.
- Add some blur and erode it. Eroding will make our image more bold in this case.
- Pass to prediction.
- Return prediction label and accuracy.
def classifier(segments):
    pred_lbl = ""
    acc = []
    for segment in segments:
        segment = cv2.resize(segment, (32, 32))
        segment = cv2.GaussianBlur(segment, (3, 3), 0)
        segment = cv2.erode(segment, (3, 3), 1)
        #show(segment)

        lbl, a = prediction(segment)
        pred_lbl+=lbl
        acc.append(a)
    return pred_lbl, np.array(acc).mean()
classifier(segments[0])
('मगन', 98.80913893381755)
Now most of methods are done well. Now is the time to wrap our all methods inside a class.
Class: Devanagari Handwritten Character OCR
I am not going to explain much about this class because I have already explained most of the methods above. But I have modified some methods and added some other methods too. I encourage you to look from the main method.
import numpy as np
import matplotlib.pyplot as plt
import cv2
import time
from tensorflow.keras.models import model_from_json
from tensorflow.keras.models import load_model
from PIL import ImageDraw, Image, ImageFont
class DHCOCR:
def __init__(self, model_dir="cnn/", bthresh=0.092, min_seg=10, scheck=0.15):
self.model_dir = model_dir
self.bthresh = bthresh
self.check_color=5
self.min_seg=min_seg
self.scheck=scheck
#self.thresh=thresh
self.model = None
self.fontPath="gargi.ttf"
self.segment_prediction={}
def show(self, img, figsize=(20, 20)):
fig = plt.figure(figsize=figsize)
plt.imshow(img, cmap="gray")
plt.show()
def borders(self, here_img, thresh):
shape = here_img.shape
check= int(self.bthresh*shape[0])
image = here_img[:]
top, bottom = 0, shape[0] - 1
#find the background color for empty column
bg = np.repeat(thresh, shape[1])
count = 0
for row in range(1, shape[0]):
if (np.equal(bg, image[row]).any()) == True:
#print(count)
count += 1
else:
count = 0
if count >= check:
top = row - check
break
bg = np.repeat(thresh, shape[1])
count = 0
rows = np.arange(1, shape[0])
#print(rows)
for row in rows[::-1]:
if (np.equal(bg, image[row]).any()) == True:
count += 1
else:
count = 0
if count >= check:
bottom = row + count
break
d1 = (top - 2) >= 0
d2 = (bottom + 2) < shape[0]
d = d1 and d2
if(d):
b = 2
else:
b = 0
return (top, bottom, b)
def preprocess(self, img):
bgr_img = cv2.cvtColor(img, cv2.COLOR_BGR2GRAY)
blur = cv2.GaussianBlur(bgr_img,(5,5),0)
ret,th_img = cv2.threshold(blur,0,255,cv2.THRESH_BINARY_INV+cv2.THRESH_OTSU) #converts black to white and inverse
rows, cols = th_img.shape
bg_test = np.array([th_img[i][i] for i in range(5)])
if bg_test.all() == 0:
text_color = 255
else:
text_color = 0
self.bg_color=text_color
tb = self.borders(th_img, text_color)
lr = self.borders(th_img.T, text_color)
dummy = int(np.average((tb[2], lr[2]))) + 2
template = th_img[tb[0]+dummy:tb[1]-dummy, lr[0]+dummy:lr[1]-dummy]
#plt.imshow(template)
#plt.show()
return (template, tb, lr)
def segmentation(self, bordered):
try:
min_seg=self.min_seg
scheck=self.scheck
thresh=self.bg_color
shape = bordered.shape
check = int(scheck * shape[0])
image = bordered[:]
image = image[check:].T
shape = image.shape
#plt.imshow(image)
#plt.show()
#find the background color for empty column
bg = np.repeat(255 - thresh, shape[1])
bg_keys = []
for row in range(1, shape[0]):
if (np.equal(bg, image[row]).all()):
bg_keys.append(row)
lenkeys = len(bg_keys)-1
new_keys = [bg_keys[1], bg_keys[-1]]
#print(lenkeys)
for i in range(1, lenkeys):
if (bg_keys[i+1] - bg_keys[i]) > check:
new_keys.append(bg_keys[i])
#print(i)
new_keys = sorted(new_keys)
#print(new_keys)
segmented_templates = []
first = 0
bounding_boxes = []
for key in new_keys[1:]:
segment = bordered.T[first:key]
if segment.shape[0]>=min_seg and segment.shape[1]>=min_seg:
segmented_templates.append(segment.T)
bounding_boxes.append((first, key))
first = key
last_segment = bordered.T[new_keys[-1]:]
if last_segment.shape[0]>=min_seg and last_segment.shape[1]>=min_seg:
segmented_templates.append(last_segment.T)
bounding_boxes.append((new_keys[-1], new_keys[-1]+last_segment.shape[0]))
#print(bounding_boxes)
return(segmented_templates, bounding_boxes)
except:
return [[bordered], [(0, bordered.shape[1]-1)]]
def localize(self, orig_img, tb, lr, segments):
d=5
rimg = orig_img.copy()
boxes = []
for simg, bb in zip(segments[0], segments[1]):
bb = np.array(bb)
bb += lr[0]
# draw rows
#rimg[tb[0]-d:tb[0], bb[0]-d:bb[1]+d] = 0
#rimg[tb[1]:tb[1]+d, bb[0]-d:bb[1]+d] = 0
# draw cols
#rimg[tb[0]-d:tb[1]+d, bb[0]-d:bb[0]+d] = 0
#rimg[tb[0]-d:tb[1]+d, bb[1]-d:bb[1]+d] = 0
#print(tb, bb)
boxes.append((tb[0]-d, tb[1]+d, bb[0], bb[1]))
#show(rimg)
rimg = self.img.copy()
for box in boxes:
t, b, l, r = box
cv2.rectangle(rimg, (l, t), (r, b), (255-self.bg_color, 255-self.bg_color, 255-self.bg_color), d)
#show(rimg)
self.boxes=boxes
return rimg, boxes
def prediction(self, img):
# load json and create model
if self.model is None:
json_file = open('cnn\cnn.json', 'r')
loaded_model_json = json_file.read()
json_file.close()
loaded_model = model_from_json(loaded_model_json)
# load weights into new model
loaded_model.load_weights("cnn\cnn.h5")
#print("Loaded model from disk")
loaded_model.save('cnn.hdf5')
loaded_model=load_model('cnn.hdf5')
self.model = loaded_model
characters = '०,१,२,३,४,५,६,७,८,९,क,ख,ग,घ,ङ,च,छ,ज,झ,ञ,ट,ठ,ड,ढ,ण,त,थ,द,ध,न,प,फ,ब,भ,म,य,र,ल,व,श,ष,स,ह,क्ष,त्र,ज्ञ'
self.characters = characters.split(',')
else:
loaded_model=self.model
#characters = self.characters
x = np.asarray(img, dtype = np.float32).reshape(1, 32, 32, 1) / 255
output = loaded_model.predict(x)
output = output.reshape(46)
predicted = np.argmax(output)
devanagari_label = self.characters[predicted]
success = output[predicted] * 100
return devanagari_label, success
def write_character(self, img, pos, txt, fsize=5, fcolor=(0, 100, 100, 0)):
img = Image.fromarray(img)
draw = ImageDraw.Draw(img)
font = ImageFont.truetype(self.fontPath, fsize)
draw.text(xy=pos, text=txt, font=font, fill=fcolor)
return np.array(img)
def classifier(self, segments):
pred_lbl = ""
acc = []
#print(len(segments))
for i, segment in enumerate(segments[0]):
if self.bg_color==0:
segment=255-segment
#self.show(segment)
segment = cv2.resize(segment, (32, 32))
segment = cv2.GaussianBlur(segment, (3, 3), 0)
segment = cv2.erode(segment, (3, 3), 1)
#show(segment)
lbl, a = self.prediction(segment)
self.segment_prediction[self.boxes[i]] = lbl
pred_lbl+=lbl
acc.append(a)
return pred_lbl, np.array(acc).mean()
def easy_flow(self, img, view="image"):
prepimg, tb, lr = self.preprocess(img)
segments=self.segmentation(prepimg)
#print(segments[1])
localized = self.localize(img, tb, lr, segments)
op = self.classifier(segments)
print(op)
if view=="image":
d = int(100*500/localized[0].shape[0])
limg = self.write_character(localized[0], pos=(lr[1], tb[0]-d), txt=op[0], fsize=d)
self.show(img=limg)
elif view=="frame":
d = int(30*400/localized[0].shape[0])
#print(d)
limg = self.write_character(localized[0], pos=(lr[0], tb[0]-d), txt=op[0], fsize=d)
self.show(img=limg)
#print(limg.shape)
cv2.imshow("Detection", limg)
def camera(self, flag):
choice = print("Click spacebar for photo and anything else for video.\n")
orig = 1
cap = cv2.VideoCapture(0)
tr = 0.1
br = 0.8
lc = 0.1
rc = 0.8
f = 0
while(flag):
ret, frame = cap.read()
if ret:
self.img = cv2.cvtColor(frame, cv2.COLOR_BGR2RGB)
#frame = cv2.flip(frame, 1)
#key event
s = cv2.waitKey(2) & 0xFF
if(chr(s) == 'x'):
f = -1
if(chr(s) == 'z'):
f = 1
if(chr(s) == 'a'):
tr = tr + 0.1 * f
if(chr(s) == 'd'):
br = br + 0.1 * f
if (chr(s) == 's'):
lc = lc + 0.1 * f
if (chr(s) == 'w'):
rc = rc + 0.1 * f
s_x, s_y = np.shape(frame)[0] * tr, np.shape(frame)[1] * lc
e_x, e_y = np.shape(frame)[1] * br, np.shape(frame)[0] * rc
s_x, s_y = np.int32(s_x), np.int32(s_y)
e_x, e_y = np.int32(e_x), np.int32(e_y)
gray = cv2.cvtColor(frame, cv2.COLOR_BGR2GRAY)
ogray = gray[:]
gray = gray[s_y:e_y, s_x:e_x]
self.img = self.img[s_y:e_y, s_x:e_x]
#original = frame[s_y:e_y, s_x:e_x]
if (s == 32): #space to capture image and do recognition
time1 = time.time()
self.show(frame, (10, 10))
self.easy_flow(self.img, "frame")
print("In %f" %(time.time()-time1), 'sec')
if (s == 13): #enter to do realtime recognition
orig = 0
#cv2.destroyWindow('Project DCR')
print("Doing RT...")
self.easy_flow(self.img, "frame")
else:
if(orig != 0):
show = frame[:]
text = "Press 'space' to take a photo and 'enter' to do realtime(slow)."
text1 = "Make sure the character is inside rectangle."
text2 = "a/s/d/w for change rectangle and z/x for inc/dec."
cv2.putText(show, text1, (15, 50), cv2.FONT_HERSHEY_COMPLEX, 0.75, (0, 100, 200))
cv2.putText(show, text2, (0, np.shape(frame)[0] - 10), cv2.FONT_HERSHEY_COMPLEX, 0.65, (50, 20, 255))
cv2.rectangle(show, (s_x, s_y), (e_x, e_y), (0, 255, 0), 2)
cv2.putText(show, text, (15, 30), cv2.FONT_HERSHEY_SIMPLEX, 0.6, (15, 0, 255), lineType=cv2.LINE_AA)
cv2.imshow('Project DCR', show)
else:
print('Trying.....\n')
continue
if s == 27:
break
cap.release()
cv2.destroyAllWindows()
def main(self, img=None):
if img is None:
# go to Camera mode
self.use_camera(True)
else:
try:
img = cv2.imread(img, 1)
self.img=img
#self.show(img)
time1 = time.time()
self.easy_flow(img)
print("In %f" %(time.time()-time1), 'sec')
except:
print("Image not found now turning to video mode.\n")
try:
self.camera(True)
except:
print('Something is wrong. Try with more stable, less noise and clear picture.\n')
#cap.release()
cv2.destroyAllWindows()
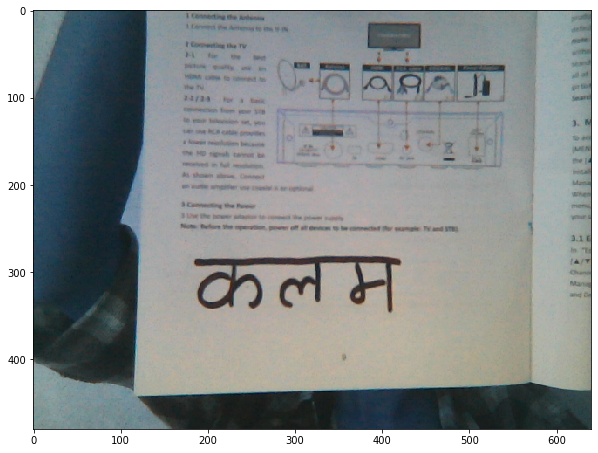
docr = DHCOCR()
docr.main(img="Assets/maganaa.png")
docr.segment_prediction
# prepimg, tb, lr = docr.preprocess(img)
# segments=docr.segmentation(prepimg)
# # for simg in segments[0]:
# # plt.imshow(simg)
# # plt.show()
# localized = docr.localize(img, tb, lr, segments)
# docr.classifier(segments[0])
Image not found now turning to video mode.

Click spacebar for photo and anything else for video.
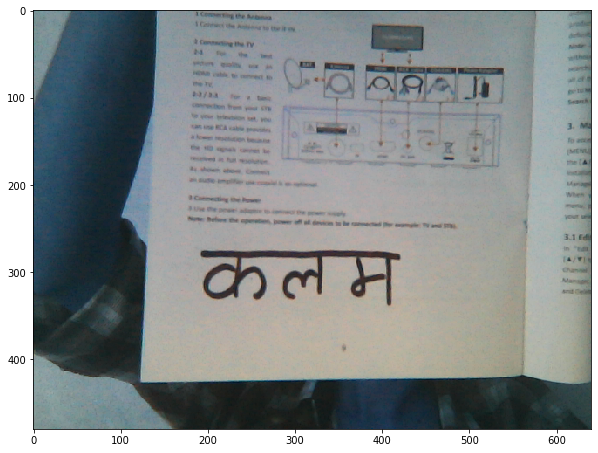
('कलम', 99.99161561330159)
In 1.159993 sec
('कलम', 99.90773598353069)
In 1.197987 sec
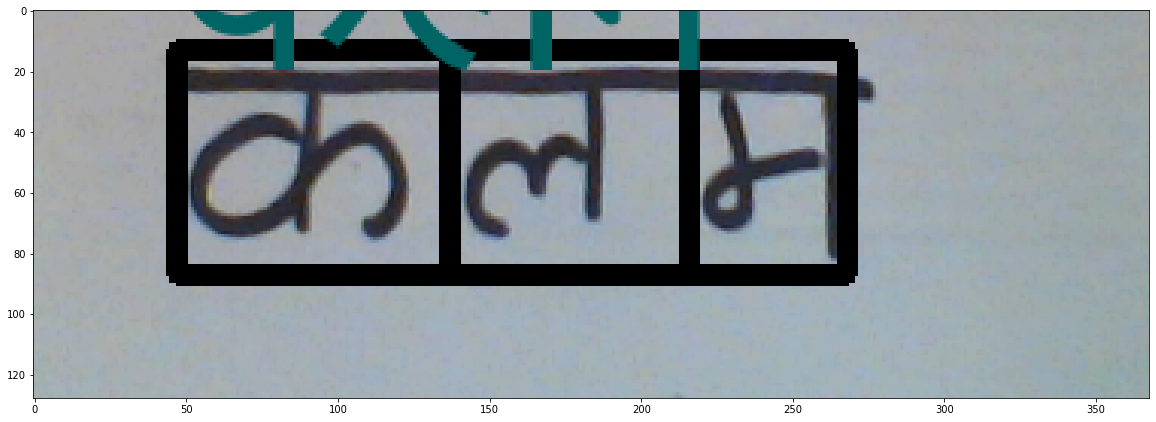
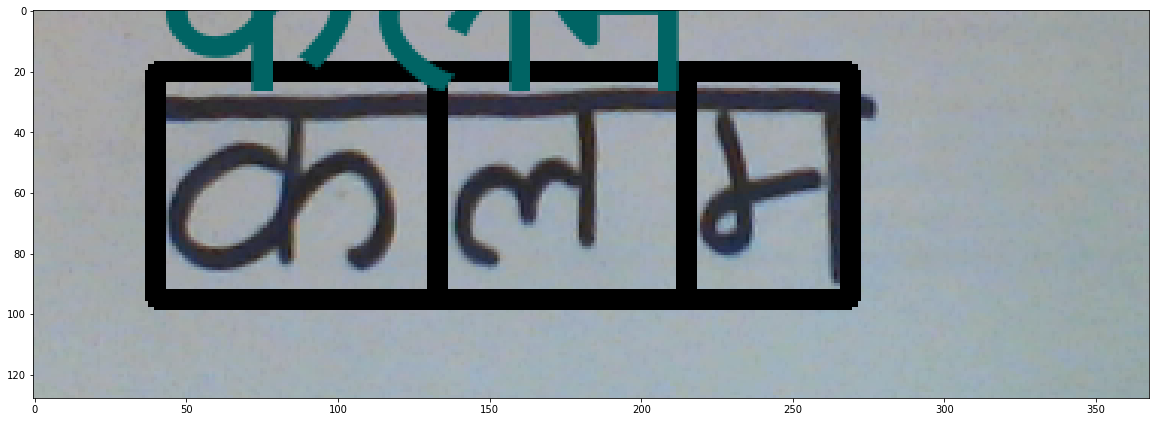
{
(13, 87, 47, 137): 'क',
(13, 87, 137, 216): 'ल',
(13, 87, 216, 268): 'म'
}
Method: show
This is simple method made with matplotlib to visualise our image on bit larger figure.
Method: main
A method that is called by object and this method performs detection on image if image path is valid. And if image path is not valid then the camera is turned on. This method depends on easy_flow method.
Method: camera
A method to do entire camera work. Notes:
- Keys a/s/d/w are used to move rectangle on left/right/down/top respectively. And keys z/x are used to tune movement of a/s/d/w on +ve or -ve direction.
- Key
spaceis used for taking the image inside ROI and then pass it to further methods to perform detection. - Key Enter is used to do realtime detection but this is not fast and valid at this time.
- Key Escape to exit from the camera mode.
Method: easy_flow
A method to do entire tasks. This method is to help main method.
- Call method
preprocessby passing original image and take cropped image, top/bottom and left/right values of text on image. - Call method
segmentationby passing cropped image and take segments. - Call method
localizeby passing segments and take a localized image. - Call method
classifierby passing segments. - Call method
write_characterby passing localized image, position, predicted label, font size. - Call method
showto view the final image.
Method: preprocess
A method to do preprocessing tasks like image cropping, background color finding. Please follow the section above to see how this method uses border method to crop an image.
Method: segmentation
Please follow the demo given earlier for simple explanation. But the method used above is modified, more imporved. Let me know if ther are any problems.
Method: localize
Instead of using template matching and drawing a rectangle around a matched region, we are using the bounding box approach. Take a segmenting columns from above method and then use that to find the boxes, then draw it. Easy.
Method: classifier
This method takes segments as input and resizes the segment, adds some blur and passes it to classifer. A method prediction prepares the classification model and returns the label, accuracy of segment’s prediciton.
Method: write_character
A method which writes the character predicted by our model on the image. Devanagari is not supported by OpenCV hence we have to use PIL also we used font.
Finally
We have created a simple OCR for Devanagari using NumPy, Keras, OpenCV. Currently this is only running on OpenCV window and python program. Making it web runnable will be my next task. The demo of current system looks like below.
What next?
I am always looking for feedback and i hope everyone finds this project useful. If you have any doubt or problem regarding this project then you can find me on LinkedIn as Ramkrishna Acharya. For next step of this project, i will implement this project on Web APP using flask. In the mean time i recommend you to view some of my works.
Why not read more?
- Gesture Based Visually Writing System Using OpenCV and Python
- Gesture Based Visually Writing System: Adding Visual User Interface
- Gesture Based Visually Writing System: Adding Virtual Animationn, New Mode and New VUI
- Gesture Based Visually Writing System: Add Slider, More Colors and Optimized OOP code
- Gesture Based Visually Writing System: A Web App
- Contour Based Game: Break The Bricks
- Linear Regression from Scratch
- Writing Popular ML Optimizers from Scratch
- Feed Forward Neural Network from Scratch
- Convolutional Neural Networks from Scratch
- Writing a Simple Image Processing Class from Scratch
- Deploying a RASA Chatbot on Android using Unity3d
- Naive Bayes for text classifications: Scratch to Framework
- Simple OCR for Devanagari Handwritten Text


Comments