
Building OCR For Devanagari Handwritten Character
Using Keras, OpenCv, Numpy build a simple OCR.
Contents
Inspiration
Devanagari is popular across India and Nepal. It is also a National font of Nepal so back in 2018 I thought of doing OCR for our font as a project. I had no clue how to do it but I knew some basics of Machine Learning. But I started doing it in 2019 and it ended in 3 months. In the end it became my school project.
Requirements
Some basic knowledge on Machine Learning. And for coding, you might need keras 2.X, open-cv 4.X, Numpy and Matplotlib.
Introduction
Devanagari is the national font of Nepal and is used widely throughout India also. It contains 10 numerals(०, १, २, ३, ४, ५, ६, ७, ८, ९) and 36 consonants (क, ख, ग, घ, ङ, च, छ, ज, झ, ञ, ट, ठ, ड, ढ, ण, त, थ, द, ध,न, प,फ, ब, भ, म, य, र, ल, व, श, ष, स, ह, क्ष, त्र, ज्ञ). Some consonants are complex and made by combining some others. However, throughout this project I considered them as single characters.
The required dataset is publicly available on the link. Huge credit goes to the team who collected the dataset and made it public.
Dataset Preparation
We could create our own version of the dataset but why take a lot of time rather than working with the already collected dataset. The format of the image was Grayscale with 2 pixels margin on each side. I didn’t know that much about ‘Image Datagenerator’ of Keras then so I converted all the image files to CSV file with the first column as label and remaining 1024 as pixel values. But now I highly recommend to use ‘Image Datagenerator’.
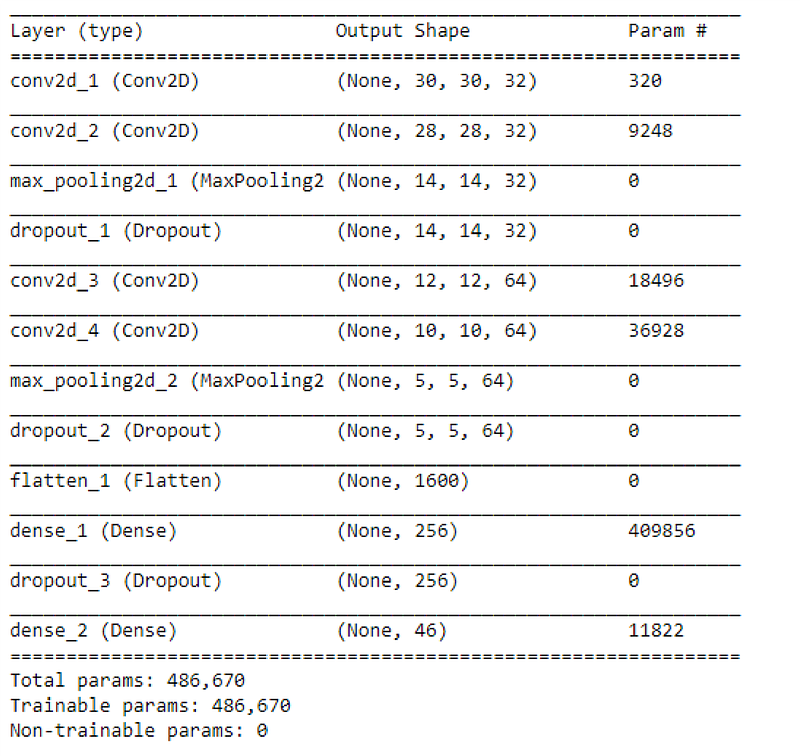
Model Preparation
For the model, I picked up a simple CNN. Keras Summary of model is given below.
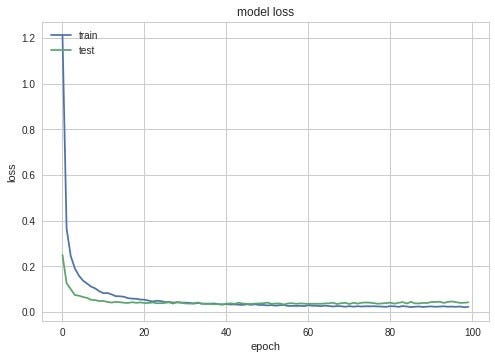
Model Training
- Loss: Categorical Cross Entropy
- Optimizer: SGD
- Batch size: 32
- Epochs: 100
- Validation split: 0.2
- Train time: 37.86 minutes on Google Colab
- Test accuracy: 99.29%
I have used various models and some weeks to train a fine model and ended up with the best one by using above parameters. Here is the image about how the model was tuned.

My Github Repository consists of all top 3 models(cnn0, cnn1, cnn2) and their code please follow through this link.
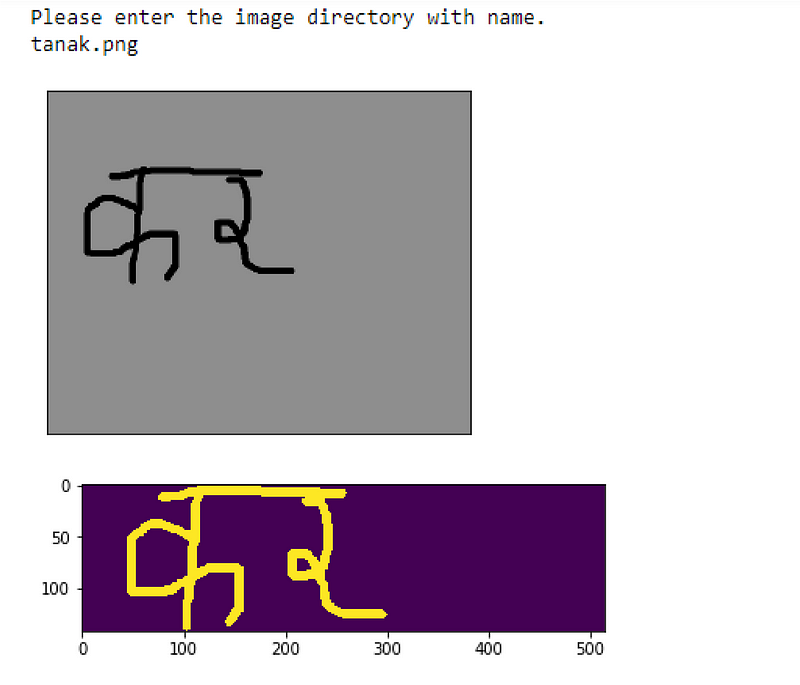
Image Processing
Training a model alone will not create an OCR. And we can’t use real world images on the model without doing pre-processing. Here is a complete image processing model code.
First we will copy the BGR(OpenCv reads on BGR) image and then convert it to Binary Image using OpenCv’s threshold function. Thresholding the image always reduces the complexity of tasks because we will be working on only 2 pixel values 0 and 255. Another important thing is we have to find the background and foreground pixels. This is a really tricky part because there will be a case where our text will be white and background be black and vice versa so we need to do some trick to always find foreground and background pixels. Here I checked only 5 pixels from the top left corner. This idea will not always work but for some time it will be a good approach.
Next we need to find the ROI. Because the text might be situated on any side of the image. So we must find the exact image position and crop it to do further processing. Next We will do segmentation. Here I used only Numpy for image cropping and segmenting. This sounds funny but it is true.
Finding ROI
Finding the real position of text is another problem. Because on real time, image can consists lot of noise and there is always a chance of finding the false shapes. To handle this I have wrote some formula. Here I set the some pixel values to be noise and neglect them. Then we keep checking from the top of the image. Whenever we find the foreground pixels more than the noise value, we crop the image from the position current_row — noise_value. We do same for other 3 sides also.
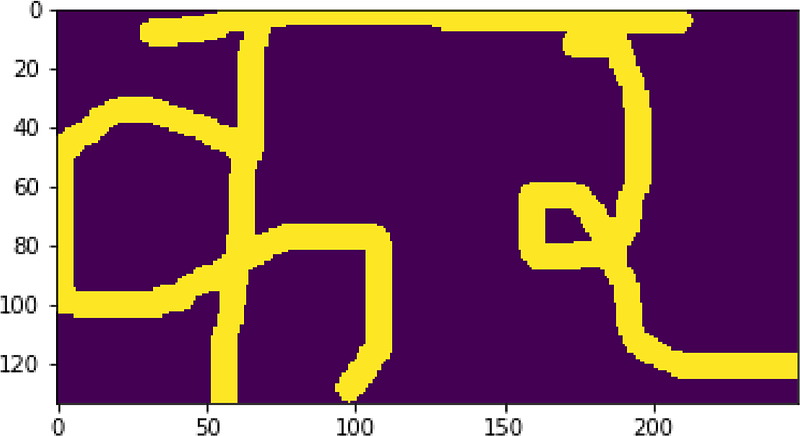
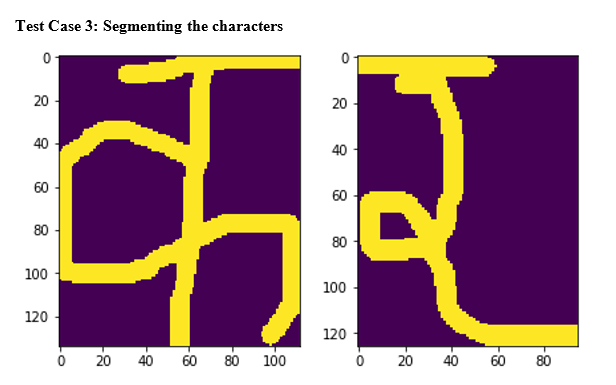
Segmentation
Now the craziest part is image segmentation using Numpy. We take the copy of the cropped image and remove the top most part of the text. In Nepali, we call it ‘Dika’. By doing this we can actually get some space between characters. So I wrote a general formula which will work for all images.

Next we will run a loop through each column and see if any column is entire a background pixel. If so it might be the right place to do segmentation but there is always a risk of having a large margin. So we send them again to the bordered function to remove the unwanted background spaces. After doing so, we will get the exact column number from which we can slice our original cropped image. I’ve called them segmented_templates here.
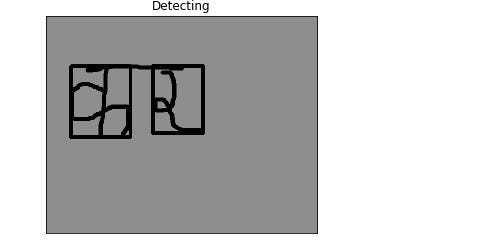
Localization
Localization is the concept of finding the exact image position and showing the border. We use the previous segments and pass them as template and using OpenCv’s template matching method we find the exact position where that segment matched. Of course the template will match 100% but I’ve set the threshold value to 0.8 here. Whenever a template matches, I’ve draw a rectangle around the matched portion of the original image. For this, I have used OpenCv’s rectangle drawing.
Add Border
Now our image must be converted to 32 by 32 size because our training data is also 32 by 32. But resizing the segments to that shape will cause our prediction to fail mostly. The reason is, our train image has a 2 pixels margin around it. And we need to do so here also.
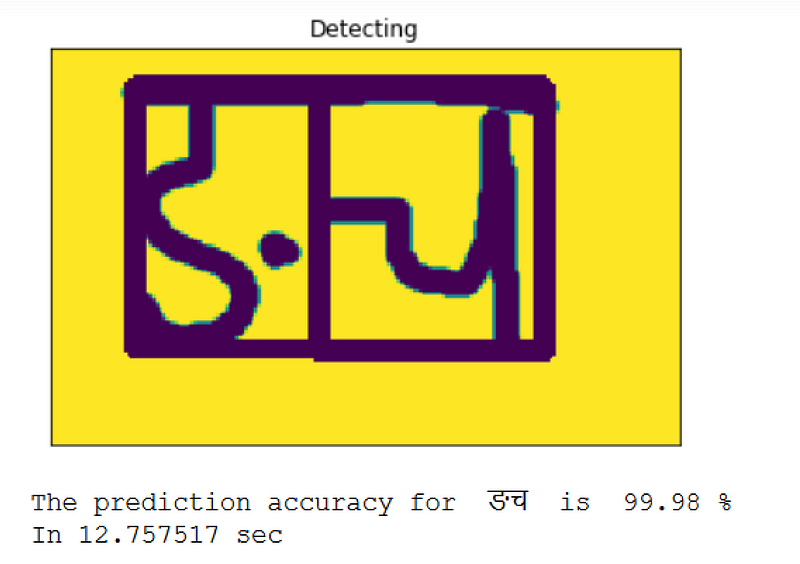
Prediction With Trained Model
For each preprocessed segment passed to this function will return the accuracy and label of prediction. We will use these in the recognition method.
Recognition Of Segments
No matter how hard we code there will always be false positive predictions. But we can try to reduce them. The problem of false positives can happen when the image quality is low and the entire text is taken as a single character. In that case, we take that as true only if the prediction is more than 80%. But in the final code to prevent localization of false segments, I have done localization after finding if the segment is true. If the prediction is less than 80%, the entire text will be treated as a single character and done prediction.
Camera For Realtime
OCR needs the camera to work. So I used OpenCV's camera methods for doing real-time image capture. Here on the above code, I wrote plenty of codes to do some interesting things. The camera will show a rectangular box and we can actually manipulate its shape also. The portion of the image lying inside the box will be sent to the recognition process. Here I used some keys like spacebar for capturing images, enter key for real-time video, etc.
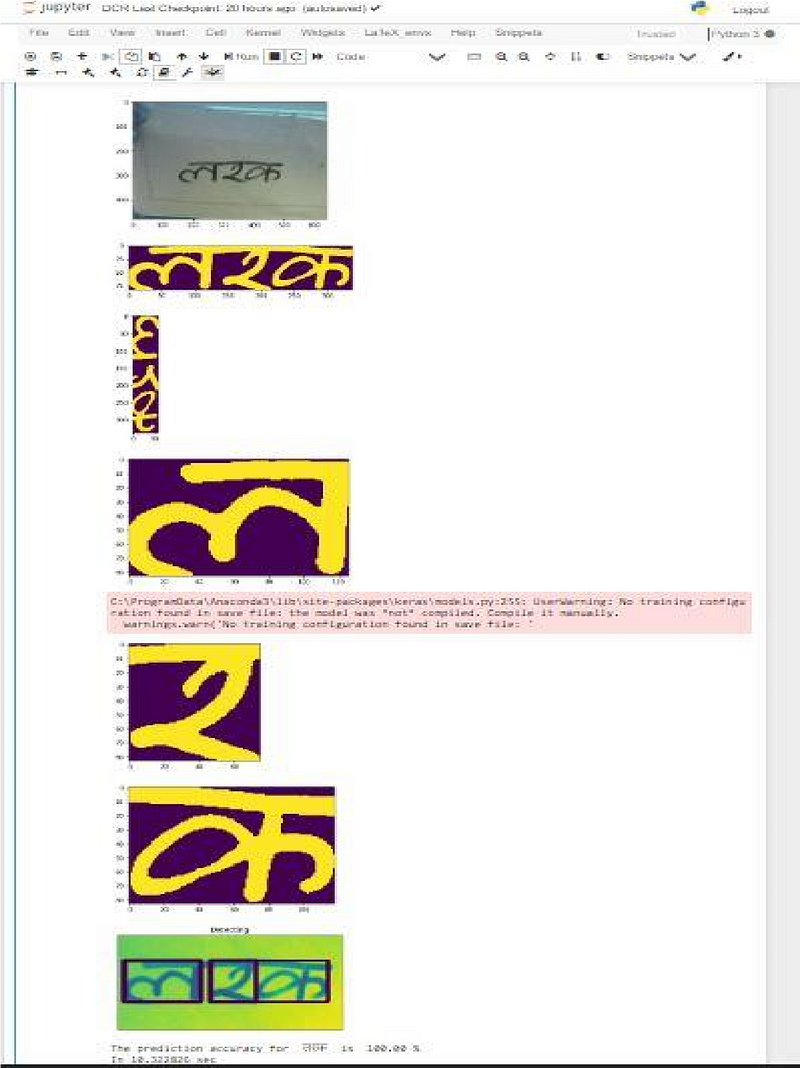
Combining It all
Now is the time for integration of all the modules. Users can pass the image location on local storage and if the image doesn’t exist, the program runs the camera mode.
I have tried to do Android App development by using TensorflowLite also but it is still paused. And I am planning to write a code for a web app.
Thank you so much for reading this article. And please follow to this Github Link for the entire project and the documentation.
Find me on Twitter.
Find me on LinkedIn.
Find me on Youtube.


Comments
Post comment