
Build an Image Merger Web Tool in Python with Streamlit, Pillow, OpenCV, and NumPy
An image merger web tool is useful when we want to combine multiple images into one image. For example, suppose we are filling an application form where we need to upload a passport copy. If the first page and last page are separate images, we may want to merge both pages into one single image before uploading.
We can do this using tools like MS Paint or online image merger websites. But those options can be slow, full of ads, limited in features, or uncomfortable when dealing with private documents.
So, why not build our own image merger tool in Python?
In this tutorial, we will build a simple image merger web app using:
- Streamlit for the web interface
- Pillow for reading uploaded images
- OpenCV for image resizing and saving
- NumPy for stacking images
- Python utility functions for cleaner code
The final app can merge multiple images horizontally or vertically, add a margin between them, preview the result, and download the merged image.
Previous Part
This blog is a continuation of the previous post:
In the previous post, we built an image size reducer. In this part, we will add an image merger feature to the same app.
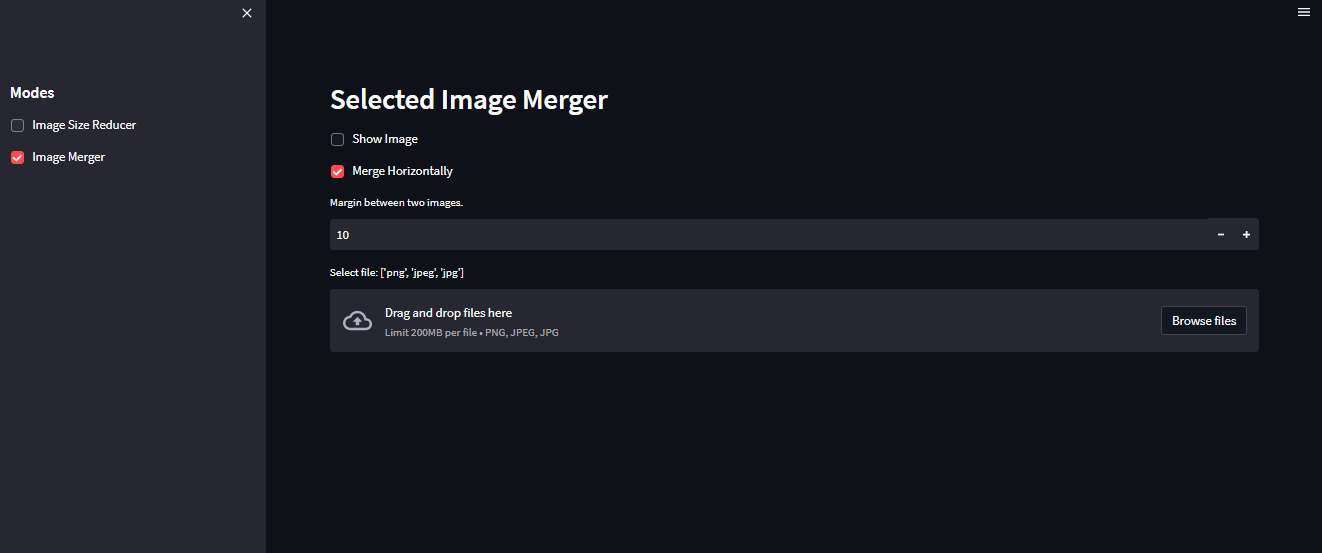
What the App Will Do
The image merger tool will have these inputs:
- Show Image: preview uploaded images
- Merge Horizontally: merge images side by side
- Margin Between: add spacing between images
- Select Files: upload multiple images
These controls allow the user to decide how the final merged image should look.
Why Build This Tool?
This small tool is useful because it can help with:
- merging passport pages
- combining screenshots
- putting before-and-after images together
- creating comparison images
- combining scanned documents
- making simple image collages
- preparing images for applications or reports
It is also a good beginner project for learning how to combine image processing and web app development.
Project Structure
A cleaner project structure can look like this:
image-processing-web-tool/
│
├── app.py
├── utils/
│   ├── __init__.py
│   ├── utils.py
│   └── variables.py
│
├── assets/
│   └── icon.png
│
├── data/
│
├── requirements.txt
└── README.md
Here:
app.pycontains the main Streamlit apputils/utils.pycontains image processing functionsutils/variables.pycontains app settingsdata/stores temporary uploaded and processed imagesassets/stores icons or static assets
This structure keeps the app easier to maintain.
Add App Title and Icon
In the previous part, we focused on the functionality. Now, let’s improve the app title and icon.
st.set_page_config(
    layout="wide",
    page_title="Image Online Tool",
    page_icon="assets/icon.png",
    menu_items={
        "About": "# Image Online Tool!"
    }
)
The icon used in the app is shown below.
![]()
Adding page configuration makes the Streamlit app feel more polished.
Make app.py Cleaner
In the previous version, all code was inside app.py. That works for a small script, but as the app grows, it becomes harder to maintain.
So, we move the image processing logic into utils/utils.py.
The main app.py can look like this:
import streamlit as st

from utils.utils import image_merger, remove_old, size_reducer


st.set_page_config(
    layout="wide",
    page_title="Image Online Tool",
    page_icon="assets/icon.png",
    menu_items={
        "About": "# Image Online Tool!"
    }
)

sidebar = st.sidebar
sidebar.markdown("## Modes")

mode_size_reducer = sidebar.checkbox("Image Size Reducer")
mode_image_merger = sidebar.checkbox("Image Merger")

remove_old()

if mode_size_reducer:
    st.markdown("## Selected Size Reducer")
    size_reducer(st)

if mode_image_merger:
    st.markdown("## Selected Image Merger")
    image_merger(st)
This file is now much easier to read. It only controls the app layout and calls the required functions.
Temporary File Cleanup
The app writes uploaded and processed images inside the data/ folder. If we do not remove old files, the folder can become large.
So, we define a function called remove_old().
import os
import time


def remove_old(folder="data", max_age_seconds=60):
    """Remove temporary files older than max_age_seconds."""
    if not os.path.exists(folder):
        os.makedirs(folder, exist_ok=True)
        return

    for file_name in os.listdir(folder):
        file_path = os.path.join(folder, file_name)

        if not os.path.isfile(file_path):
            continue

        try:
            if "temp" in file_name:
                timestamp = float(file_name.split(".")[0].split("_")[-1])
            else:
                timestamp = float(file_name.split(".")[0])

            if time.time() - timestamp > max_age_seconds:
                os.remove(file_path)

        except Exception:
            pass
This function removes files older than 60 seconds.
For a production app, we may want a safer cleanup strategy, but this is enough for a simple demo.
Variables and Allowed Extensions
It is cleaner to store allowed file extensions in one place.
Example utils/variables.py:
class Variables:
    allowed_modes_dict = {
        "Image Size Reducer": {
            "extensions": "png,jpg,jpeg"
        },
        "Image Merger": {
            "extensions": "png,jpg,jpeg"
        }
    }


var = Variables()
Now we can reuse this configuration inside the app.
Image Size Reducer Function
The size reducer function accepts the Streamlit instance as st. This lets the function directly create Streamlit widgets and outputs.
import os
import time

import cv2
import numpy as np
from PIL import Image

from utils.variables import var


def size_reducer(st):
    exts = var.allowed_modes_dict["Image Size Reducer"]["extensions"].split(",")

    uploaded_file = st.file_uploader(
        f"Select file: {exts}",
        type=exts
    )

    if uploaded_file is None:
        return

    file_extension = uploaded_file.name.split(".")[-1]
    file_name = f"data/{int(time.time())}.{file_extension}"

    image = Image.open(uploaded_file).convert("RGB")

    with open(file_name, "wb") as file:
        file.write(uploaded_file.getbuffer())

    image = np.asarray(image)
    height, width, _ = image.shape

    show_image = st.checkbox("Show Image")

    if show_image:
        st.image(image, use_column_width=True)

    st.markdown(
        f"""
        Original dimension of the image: `{height, width}`
        Original size of the image: `{os.path.getsize(file_name) / 1024:.2f} KB`
        Please select new height and width.
        """
    )

    cols = st.columns(2)

    new_height = cols[0].number_input(
        "Height",
        min_value=1,
        value=int(height)
    )

    new_width = cols[1].number_input(
        "Width",
        min_value=1,
        value=int(width)
    )

    if st.button("Reduce size"):
        new_image = cv2.resize(
            image,
            (int(new_width), int(new_height)),
            interpolation=cv2.INTER_AREA
        )

        new_file_name = file_name.replace("data/", "data/temp_")

        new_image_bgr = cv2.cvtColor(new_image, cv2.COLOR_RGB2BGR)

        cv2.imwrite(new_file_name, new_image_bgr)

        st.markdown(
            f"New file size: `{os.path.getsize(new_file_name) / 1024:.2f} KB`"
        )

        with open(new_file_name, "rb") as file:
            st.download_button(
                label="Download image file",
                data=file,
                file_name=new_file_name.split("/")[-1],
                mime="image/png"
            )
This function follows the same idea as the previous part, but it is cleaner and easier to read.
Image Merger Function
Now comes the main part: merging images.
The function will:
- accept multiple uploaded files
- read all images
- calculate average height and width
- resize all images to the same size
- create a white margin
- stack images horizontally or vertically
- save the final image
- provide a download button
import io
import time

import cv2
import numpy as np
from PIL import Image

from utils.variables import var


def image_merger(st):
    exts = var.allowed_modes_dict["Image Merger"]["extensions"].split(",")

    show_image = st.checkbox("Show Image")
    merge_horizontally = st.checkbox("Merge Horizontally")
    margin = st.number_input("Margin between images", min_value=0, value=10)

    uploaded_files = st.file_uploader(
        f"Select files: {exts}",
        type=exts,
        accept_multiple_files=True
    )

    if not uploaded_files:
        st.info("Please upload two or more images to merge.")
        return

    files = []
    total_height = 0
    total_width = 0

    for uploaded_file in uploaded_files:
        file_name = f"data/{int(time.time())}_{uploaded_file.name}"

        image_bytes = uploaded_file.read()
        image = Image.open(io.BytesIO(image_bytes)).convert("RGB")

        with open(file_name, "wb") as file:
            file.write(image_bytes)

        image_array = np.asarray(image)
        height, width, _ = image_array.shape

        total_height += height
        total_width += width

        if show_image:
            st.markdown(f"### {uploaded_file.name}")
            st.image(image_array, use_column_width=True)

        files.append(file_name)

    if len(files) < 2:
        st.warning("Please upload at least two images.")
        return

    file_count = len(files)

    new_height = int(total_height / file_count)
    new_width = int(total_width / file_count)

    if merge_horizontally:
        margin_image = np.ones((new_height, int(margin), 3), dtype=np.uint8) * 255
    else:
        margin_image = np.ones((int(margin), new_width, 3), dtype=np.uint8) * 255

    merged_image = None

    for file_path in files:
        image = cv2.imread(file_path)

        if image is None:
            st.error(f"Could not read image: {file_path}")
            continue

        image = image[:, :, ::-1]
        image = cv2.resize(image, (new_width, new_height))

        if merged_image is None:
            merged_image = image.copy().astype(np.uint8)
        else:
            if merge_horizontally:
                merged_image = np.hstack([merged_image, margin_image, image])
            else:
                merged_image = np.vstack([merged_image, margin_image, image])

            merged_image = merged_image.astype(np.uint8)

    if merged_image is None:
        st.error("Could not merge images.")
        return

    st.markdown("### Merged Image")
    st.image(merged_image, use_column_width=True)

    new_file_name = f"data/temp_{int(time.time())}.png"

    cv2.imwrite(new_file_name, merged_image[:, :, ::-1])

    with open(new_file_name, "rb") as file:
        st.download_button(
            label="Download image file",
            data=file,
            file_name=new_file_name.split("/")[-1],
            mime="image/png"
        )
How the Image Merger Works
The merger works by resizing all images to a common average size.
new_height = int(total_height / file_count)
new_width = int(total_width / file_count)
Then it creates a white margin.
For horizontal merging:
margin_image = np.ones((new_height, int(margin), 3), dtype=np.uint8) * 255
For vertical merging:
margin_image = np.ones((int(margin), new_width, 3), dtype=np.uint8) * 255
Then images are stacked using NumPy.
Horizontal merge:
np.hstack([merged_image, margin_image, image])
Vertical merge:
np.vstack([merged_image, margin_image, image])
This is the core idea behind the image merger.
Horizontal Image Merger Output
The horizontal merger looks like this:
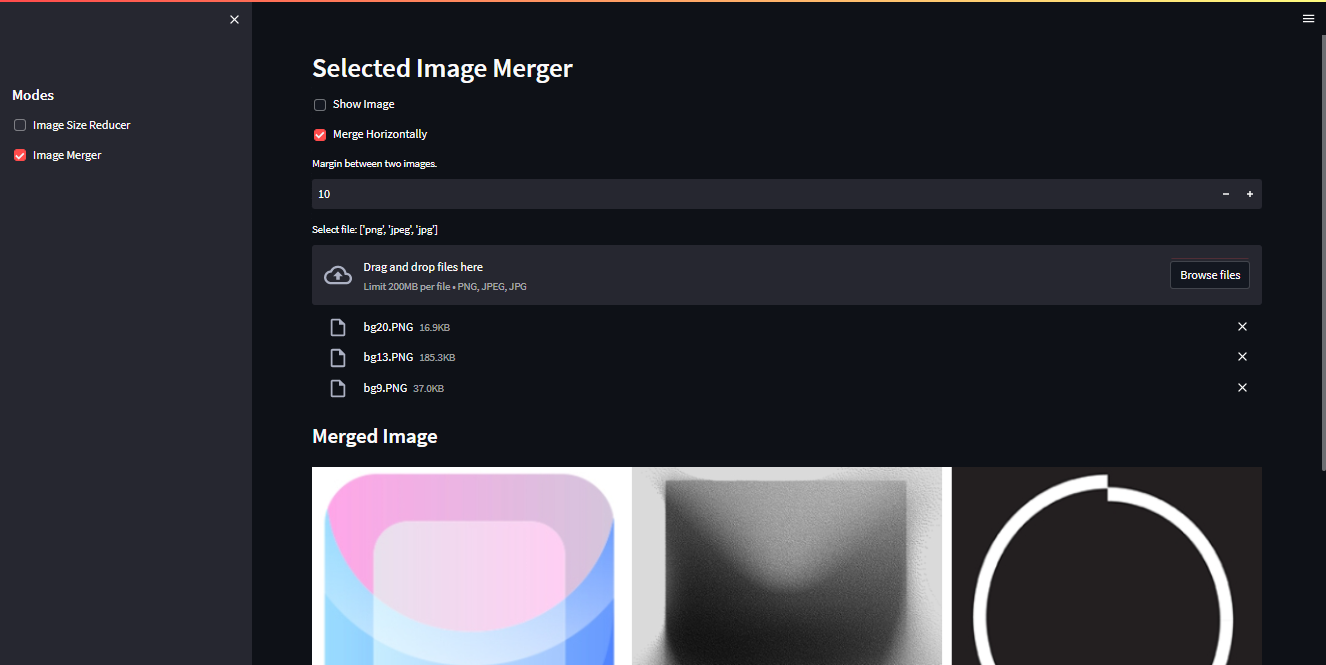
This is useful when we want images side by side.
Margin Between Images
The margin also plays an important role in making the merged image readable.
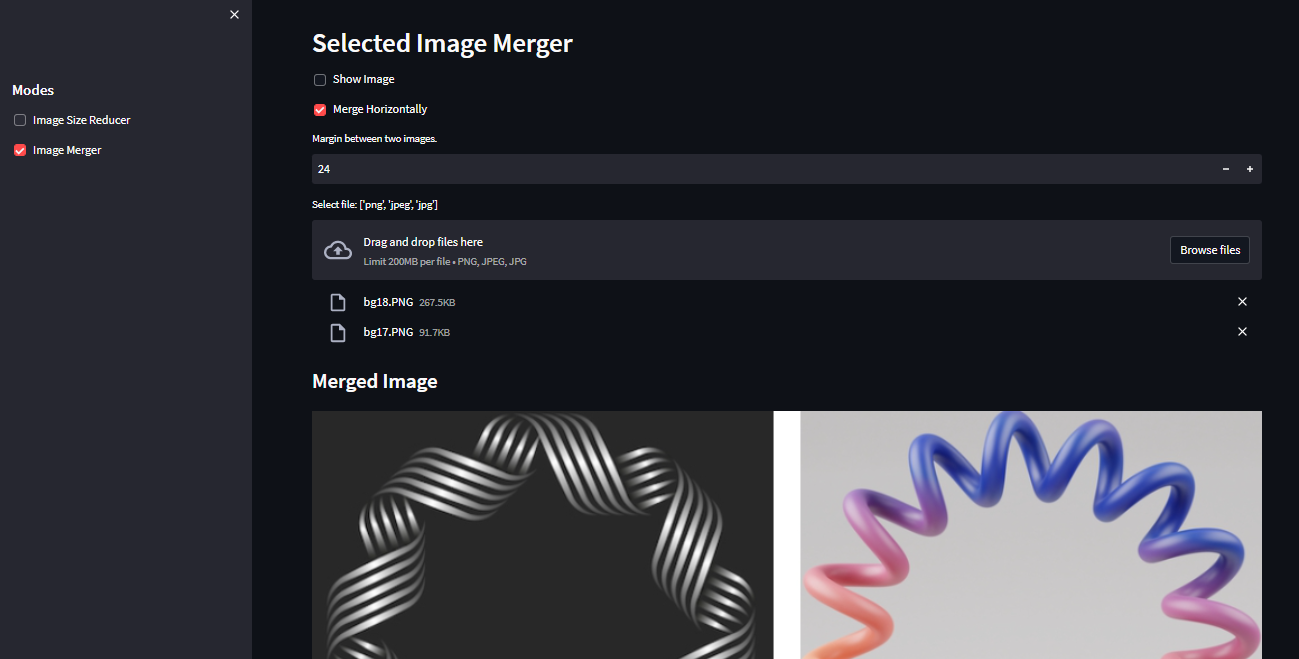
Without margin, images may touch each other and look unclear. A small white margin makes the final output cleaner.
Better UI Ideas
The current app is simple, but we can improve the user interface further.
Some useful improvements are:
- add radio buttons for merge direction
- add margin color picker
- add output filename input
- add image order controls
- show final image dimensions
- show final file size
- allow custom width and height
- allow original-size merging
- allow PDF export
For example, instead of a checkbox for merge direction, we can use:
merge_direction = st.radio(
    "Merge direction",
    ["Horizontal", "Vertical"]
)

merge_horizontally = merge_direction == "Horizontal"
This is clearer for users.
Add Margin Color
Currently, the margin is white. We can allow users to choose the margin color.
margin_color = st.color_picker("Margin color", "#FFFFFF")
Convert hex color to RGB:
def hex_to_rgb(hex_color):
    hex_color = hex_color.lstrip("#")

    return tuple(
        int(hex_color[i:i + 2], 16)
        for i in (0, 2, 4)
    )
Then create the margin:
rgb_color = hex_to_rgb(margin_color)

margin_image = np.ones((new_height, int(margin), 3), dtype=np.uint8)
margin_image[:, :] = rgb_color
This gives users more control over the final output.
Add Image Validation
Before processing images, it is good to validate them.
try:
    image = Image.open(io.BytesIO(image_bytes)).convert("RGB")
except Exception as error:
    st.error(f"Could not open image: {uploaded_file.name}. Error: {error}")
    continue
This prevents the app from crashing if a corrupted or unsupported file is uploaded.
Requirements File
For this app, the requirements.txt file can contain:
streamlit
numpy
pillow
opencv-python-headless
If you want fixed versions, you can pin them:
streamlit==1.12.0
numpy
pillow
opencv-python-headless
For cloud deployment, opencv-python-headless is preferred because it does not require GUI dependencies.
Possible Complete app.py
A simplified complete version of app.py can look like this:
import streamlit as st

from utils.utils import image_merger, remove_old, size_reducer


st.set_page_config(
    layout="wide",
    page_title="Image Online Tool",
    page_icon="assets/icon.png",
    menu_items={
        "About": "# Image Online Tool!"
    }
)

st.title("Image Online Tool")

sidebar = st.sidebar
sidebar.markdown("## Modes")

mode = sidebar.radio(
    "Select mode",
    ["Image Size Reducer", "Image Merger"]
)

remove_old()

if mode == "Image Size Reducer":
    st.markdown("## Selected Size Reducer")
    size_reducer(st)

if mode == "Image Merger":
    st.markdown("## Selected Image Merger")
    image_merger(st)
Using radio instead of multiple checkboxes prevents users from selecting multiple modes at the same time.
Common Problems and Fixes
Problem 1: Image Colors Look Wrong
OpenCV reads images in BGR format, while Pillow and Streamlit usually expect RGB.
Use:
image = image[:, :, ::-1]
or:
cv2.cvtColor(image, cv2.COLOR_BGR2RGB)
Problem 2: Merged Image Looks Stretched
The current app resizes all images to average height and width. This can distort images if their aspect ratios are very different.
A better approach is to resize based on a fixed height or fixed width while preserving aspect ratio.
Problem 3: Uploaded Files Stay in the data Folder
Use remove_old() to clean temporary files.
For production, consider cloud storage or a better temporary file cleanup system.
Problem 4: App Crashes on Invalid Image
Wrap image reading inside try/except.
Problem 5: Large Images Make the App Slow
Add a file size limit or resize images before merging.
Future Improvements
This tool can be improved in many ways:
- support PDF output
- support transparent margins
- preserve original image aspect ratio
- add custom output dimensions
- add image sorting
- add image cropping
- add image rotation
- add image compression
- add mobile-friendly layout
- deploy the app online
- add Docker support
Source Code
The source code is available on GitHub:
Final Thoughts
In this post, we added an image merger web tool to our Python Streamlit app. We used Pillow to read uploaded images, OpenCV to resize and save them, NumPy to stack them horizontally or vertically, and Streamlit to create the web interface.
This is a simple but useful image processing web app. It is also a good beginner project because it combines practical image processing, UI design, file handling, and web app development in Python.


Comments